Layouts
The Layout is the core element of PV system design within Jigawatt Fusion. In creating a Layout, you'll determine which solar panels you want to use, where they'll go and how they'll be arranged, plus some additional metrics that affect energy generation (slope, azimuth, efficiency, etc.). Jigawatt Fusion uses your specifications and PV Watts' amazing forecasting calculators to estimate the Layout's production, so you can dial in a highly-streamlined system design for your customer's specific roof and energy consumption.
In short, the Layout is where you place the panels and find out how much power they will make. Jigawatt Fusion compares the Layout against the Meter (how much energy they use) and the Quote (how much the system will cost) for a very detailed cost/benefit analysis that shows up on the Proposal.
To wrap your head around the powerful, symbiotic relationship between Layouts, Meters, and Quotes, give this article a read.
Layout modes
The Layout tool will fluidly guide you through three sequential modes:
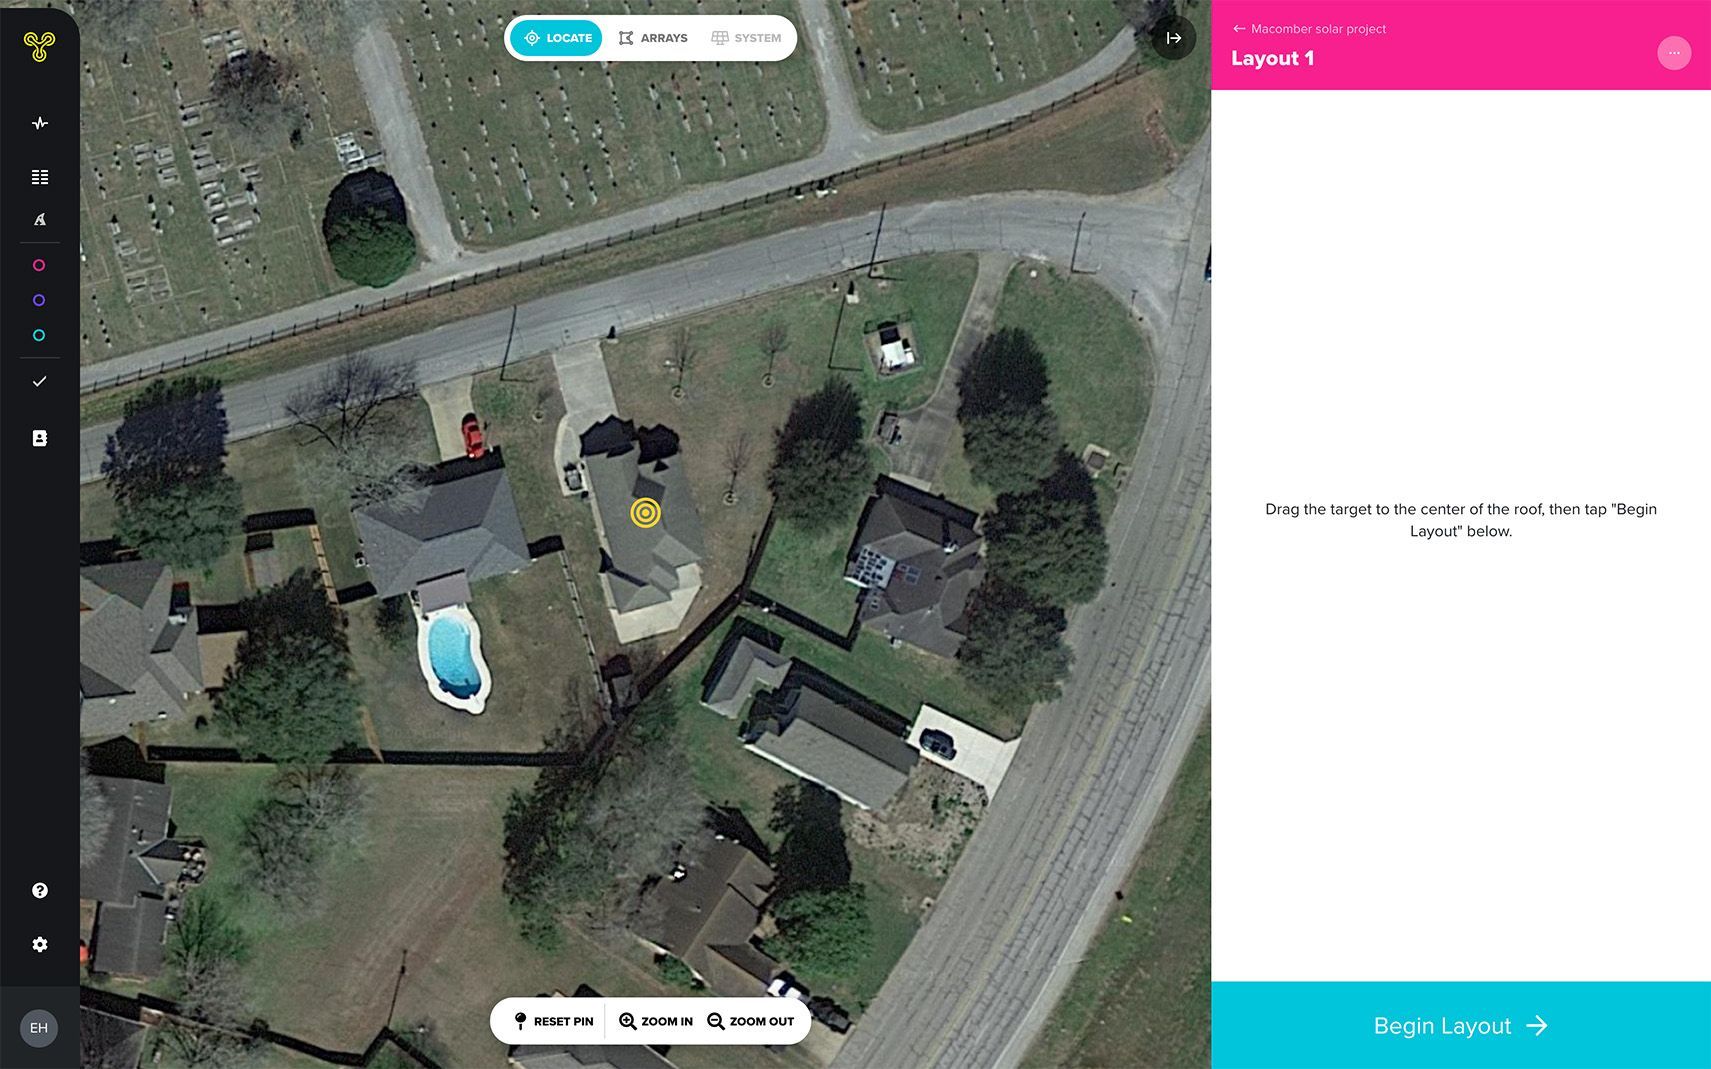
Locate - Center the map by dragging the crosshairs to the area where the panel arrays will go.
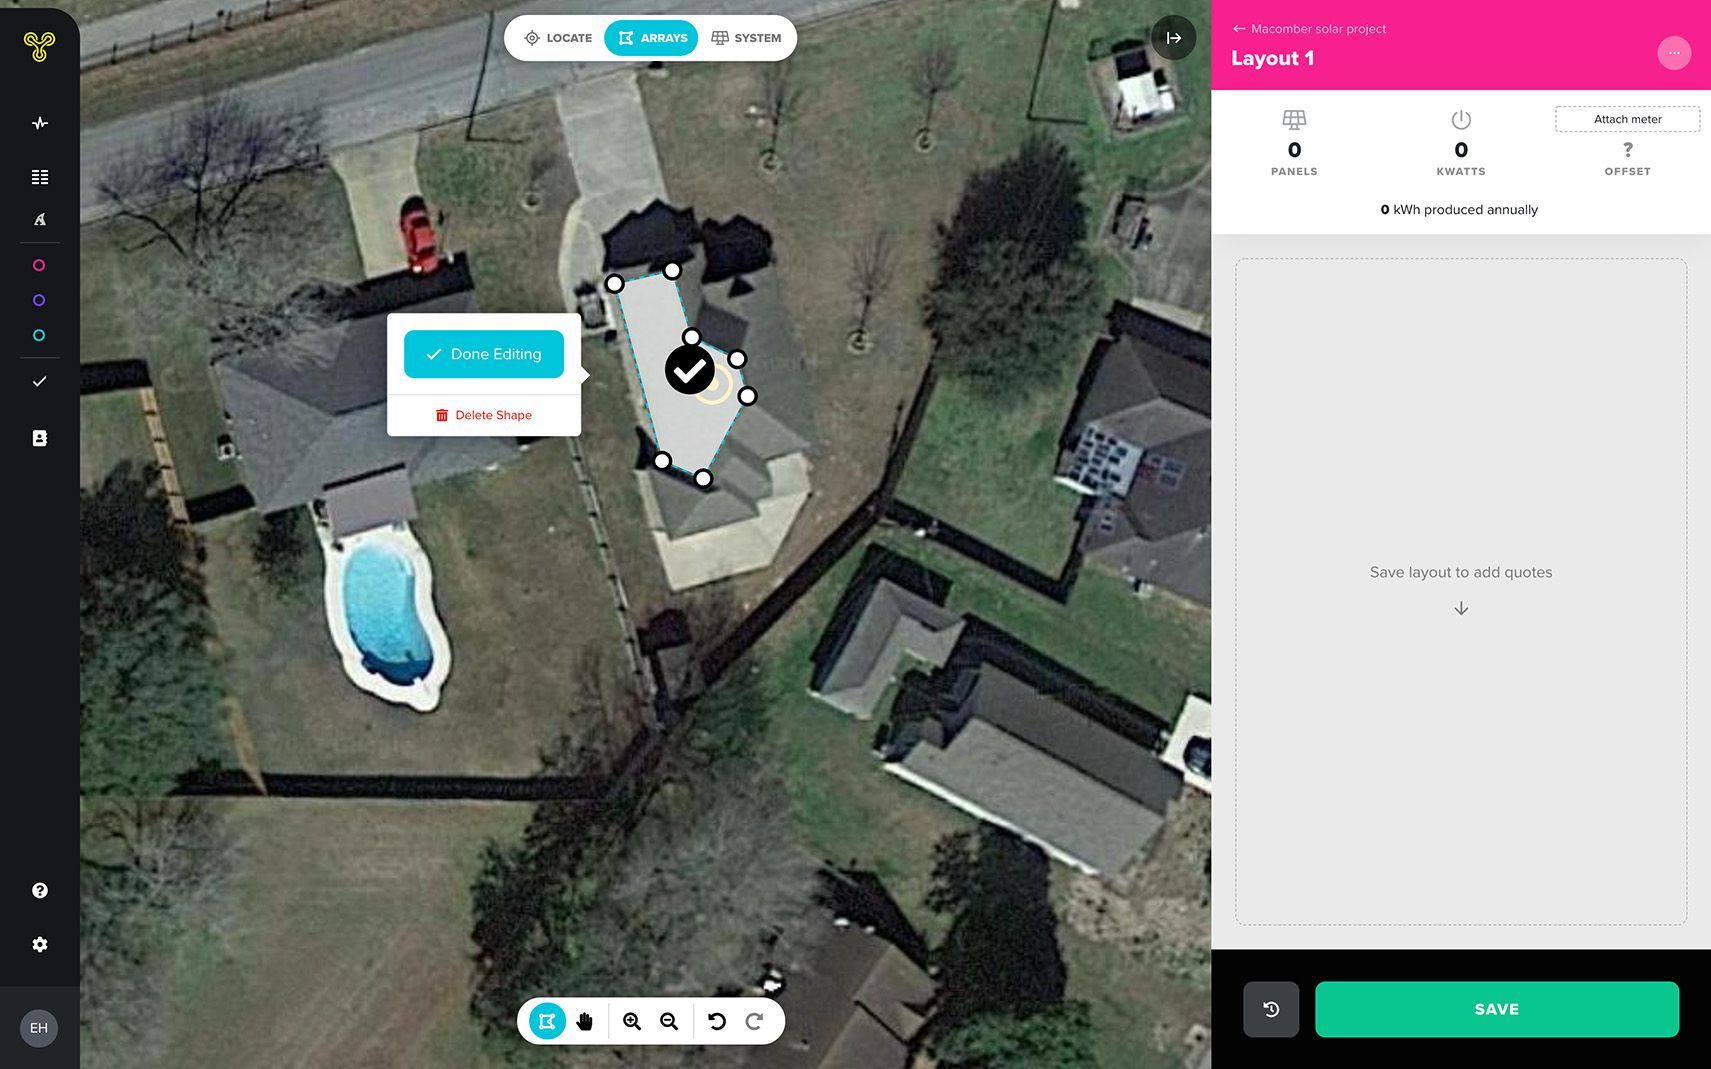
Arrays - Establish the specific areas where panels will be installed by clicking off the perimeters of the arrays.
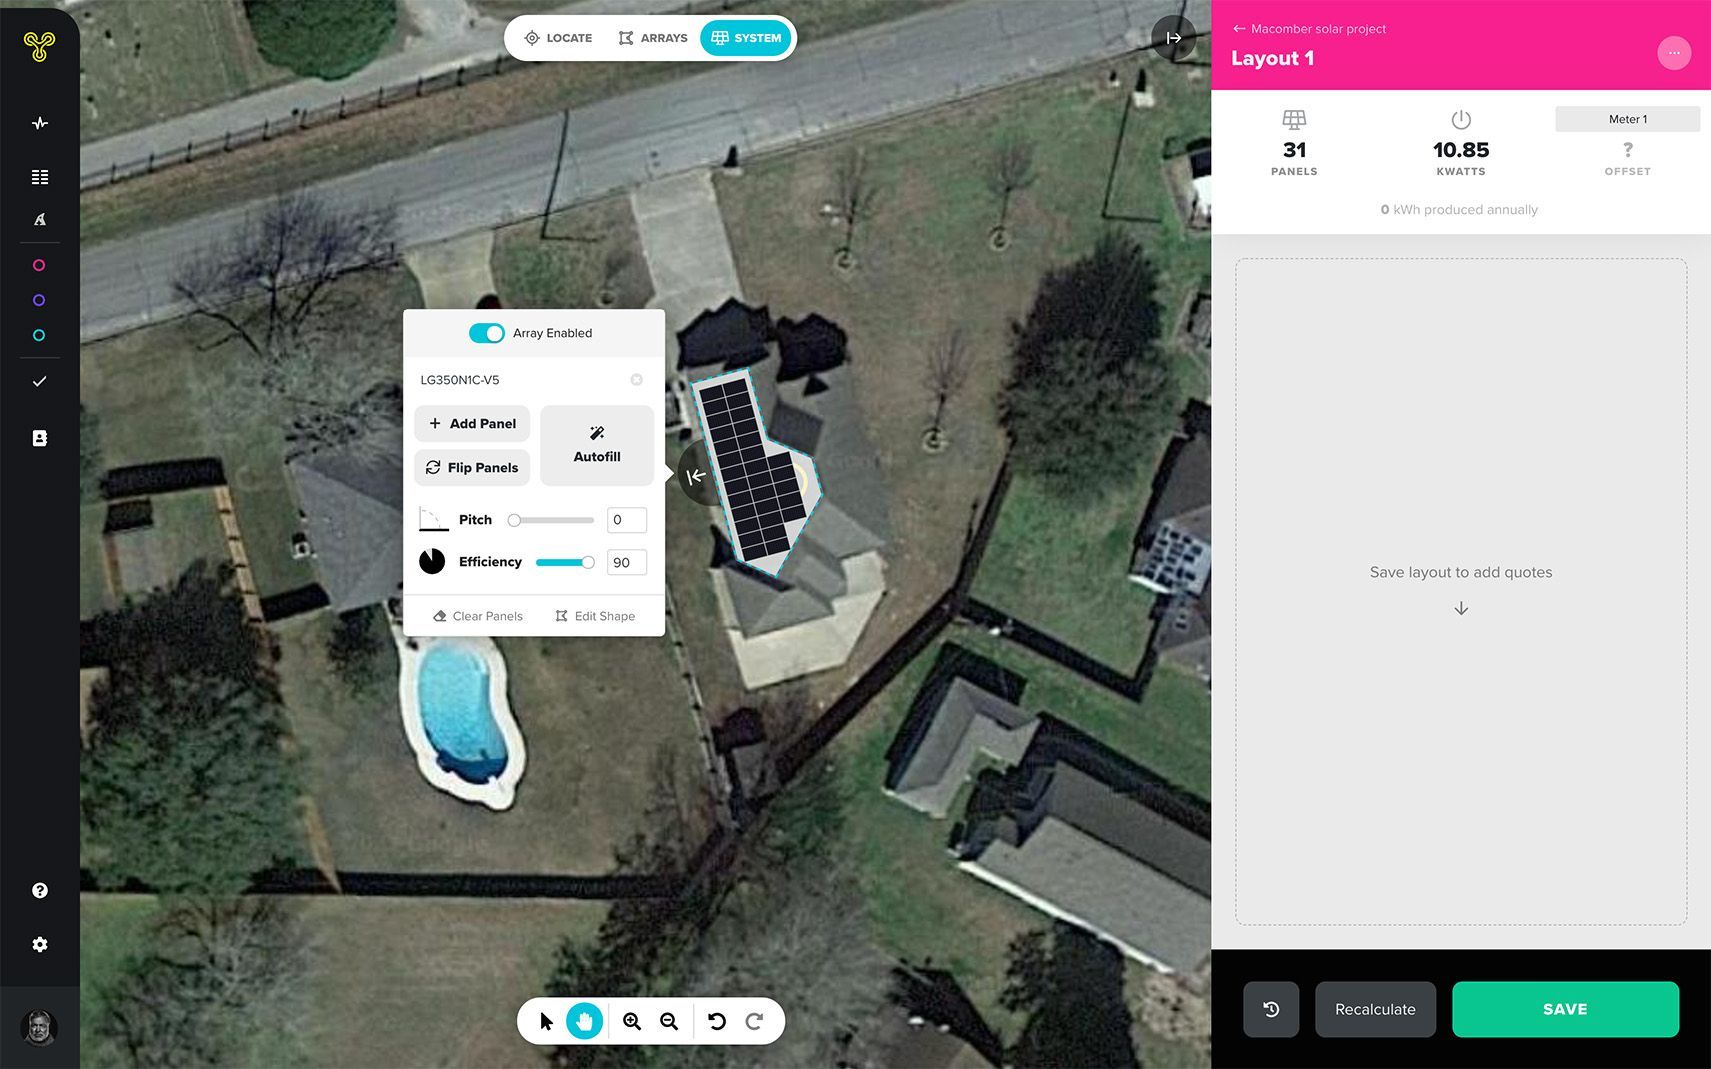
System - Choose the panel specs, and configure them how you plan to install them. Jigawatt Fusion will trigger a PV Watts production estimate based on the Layout you design.
Note that you can easily toggle between modes to make adjustments as you fine-tune your Layout.
Let's take a closer look at each of the modes.
Locate mode
On a typical house, the map will already be centered simply from the address lookup. On a larger property, where the system is a ground-mount or going on the roof of an outbuilding, locating the arrays might be slightly more relevant. Just drag the crosshairs to the center of where you want to put the panels. Zoom in or out accordingly, and click the huge Begin Layout button in the bottom right corner.

Arrays mode
Jigawatt Fusion's Layout tool groups panels into arrays, for which you trace a polygon in the shape of the area on which they'll be mounted. Here are a few considerations you'll want to bear in mind about arrays:
In most cases, each array will be shaped like individual roof planes.
Each array has specified directional settings, including the azimuth, which are factored into the PV Watts calculation. This means that if panels will be going on two different roof planes, you'll need two different arrays for accuracy's sake, even if the planes are contiguous. You'll also need different arrays if–for some weird reason–you plan on using more than one type of panel.
Each array's azimuth is indicated by a white arrow, designated the "roof edge", affixed perpendicularly to one side of the polygon. This is typically the low edge of the roof that hangs over the eaves. If the system guesses the wrong edge, just click the right one, then Set Roof Edge. While most roofs have straight edges that run perpendicular to the plane's azimuth, there are certainly exceptions, especially on funky houses built in the 70's. The azimuth can also be freely pivoted using the azimuth slider, independently of the roof edge.
The array polygon helps you to constrain the panels to specific parts of the roof. Panels that encroach on the limits you've set will be highlighted in red. You can also account for code-required setbacks, by clicking polygon sides and scaling the setback distance. Panels that encroach on setbacks are also highlighted in red.
To fine-tune the array boundaries, you can toggle between shape and edges adjusting the nodes and other settings until it's spot-on.

To advance to the next mode, click "Edit System" in the Arrays dialog.
System mode
Each array you create will have its own set of System mode configurations, but in most cases, the differences between them will be minimal. Design your system more or less in the following order:
Choose the panel spec for the Array. When you open the panel picker, it will reference your Materials Catalog (you can also flip the toggle to see the entire Global Catalog). Find the panel you want to install, and click Save.
Set the pitch of the Array. The steeper the pitch, the more the panels' perspective–as seen from space–will skew. A lot more panels fit on a 45° pitch than on a flat roof with the same footprint, 'cause physics.
Add panels. You can do this manually, by clicking + Add Panel and placing them one at a time. But it's a lot quicker to use Autofill, which plunks down as many panels as will fit in the array.
Move panels around to avoid obstructions and maximize the coolness of the array.
Make sure you make a wise consideration for the Array's efficiency, accounting for variables like shade, so you can set a proper expectation for productivity with your customer.
At any point in the System design process, hit "Recalculate" to get a speedy-fast production estimate from PV Watts, as well as an offset comparison against the Meter you already built out. In a typical Project, you'll come to the Layout page directly from the Meter, in which case the two entities will already be linked. But if you come directly to the Layout, you'll need to attach the Meter yourself. This is done in the top-right of the Layout screen.

Moving on to the Quote
Once you have the Meter and Layout all built out, it's time to add the third leg of the value proposition: the Quote. From a completed layout, just click the huge + Add Quote button.